Custom format in the Play Framework templating engine example

I have been looking into the Play Framework to do rapid development of web-services. The clean MVC separation and a simple templating system is very attractive to be able to focus on just what is needed, instead of spending a lot of time writing glue code and juggling concepts that should be in the framework.

The template engine in Play supports Html, Xml, Txt and Js. When writing web APIs, I usually want to have control over the content-type used, either for adding entirely new media-types, or for using with versioning of the API. I have been reading the documentation at http://playframework.com/documentation/2.2.x/ScalaCustomTemplateFormat that describes how to add a custom format to the template engine, and it was reasonably good. Just a few points requiring trial and error, because the exact files to put things into was not described, and the example used was how to add Html if Html was not supported, so it was not possible to just take the code and verify that it worked.

This post contains the actual files added and updated to a fresh Play 2.2.2 app to add CSV support. See the doc page referenced above for details and explanations.

Model classes

Although not strictly a part of the support for CSV, the model classes are used to demonstrate that things work, and to provide a record type for basing the concrete template example on:

app/models/Record.scala

package models

case class Record(val foo: String, val bar: String)

object Record {
  def sampleRecords = List(Record("f1","b1"), Record("f2","b2"), Record("f3","b3"))
}

Format definition

The meat of the new format is in the format implementation classes. I have put these in app/views/Csv.scala as that seemed appropriate.
The format contains the classes Csv and CsvFormat inheriting the proper classes as indicated by the official documentation.
The Csv object contains helpers for the CvsFormat object.

app/views/Csv.scala

package views

import play.api.http.ContentTypeOf
import play.api.mvc.Codec
import play.api.templates.BufferedContent
import play.templates.Format

class Csv(buffer: StringBuilder) extends BufferedContent[Csv](buffer) {
  val contentType = Csv.contentType
}

object Csv {
  val contentType = "text/csv"
  implicit def contentTypeCsv(implicit codec: Codec): ContentTypeOf[Csv] = ContentTypeOf[Csv](Some(Csv.contentType))

  def apply(text: String): Csv = new Csv(new StringBuilder(text))
  
  def empty: Csv = new Csv(new StringBuilder)
}

object CsvFormat extends Format[Csv] {
  def raw(text: String): Csv = Csv(text)
  def escape(text: String): Csv = {
    val sb = new StringBuilder(text.length)
    text.foreach {
      case '"' => sb.append("\"\"")
      case c => sb += c
    }
    new Csv(sb)
  }
}

Glue

To actually make the template compiler compile new templates, we need to define the file extension to trigger compilation. This is done by adding to the templateTypes at the end of the top-level build.sbt

build.sbt

name := "csv-play"

version := "1.0-SNAPSHOT"

libraryDependencies ++= Seq(
  jdbc,
  anorm,
  cache
)     

play.Project.playScalaSettings

templatesTypes += ("csv" -> "views.CsvFormat")

Putting it all together

The last part is to define an endpoint in the controller (in app/controllers/Application.scala), point a route at that endpoint (in conf/routes), and write a template to serve results (in app/views/records.scala.csv).

app/controllers/Application.scala

package controllers

import play.api._
import play.api.mvc._
import models.Record

object Application extends Controller {

  def index = Action {
    Ok(views.html.index("Your new application is ready."))
  }

  def records = Action {
    Ok(views.csv.records(Record.sampleRecords))
  }

}

conf/routes

# Routes
# This file defines all application routes (Higher priority routes first)
# ~~~~

# Home page
GET     /                           controllers.Application.index

GET     /records                    controllers.Application.records

# Map static resources from the /public folder to the /assets URL path
GET     /assets/*file               controllers.Assets.at(path="/public", file)

app/views/records.scala.csv

@(records: List[Record])"foo","bar"@for(r <- records) {
"@r.foo","@r.bar"}

The final result

Now everything is in place to test the new format. Run the app by doing play run in a separate terminal. Then you will observe the following result using curl as our HTTP client:

$ curl -i http://localhost:9000/records
HTTP/1.1 200 OK
Content-Type: text/csv
Content-Length: 41

"foo","bar"
"f1","b1"
"f2","b2"
"f3","b3"

Notice that the Content-Type is correctly set to the result rendered from the template.

Conclusion

This post shows a simple and straight-forward way to add a custom content-type to be used in the templating system. Using this approach, you get to write your format in the simple template language, and each endpoint in your controller does not do anything special to support the format.

There are other approaches that may be preferable in certain cases. If you have an XML-like format, you can use the Xml support in Play by having a app/views/foo.scala.xml in the template directory, but then set an explicitly different content-type in your controller, with something like:

...
  def records = Action {
    Ok(views.xml.records(Record.sampleRecords)).as("application/vnd.mycompany.api-v1+xml")
  }

This can of course also be used to abuse the Txt format in a similar way. The big downside to this approach is that you must remember to do that on every result produced by the application.

Good luck, and happy content typing!

Mysterious Problem with JUnit in IntelliJ IDEA – with Mysterious Fix!

Coming back to work after the holidays, I dutifully fired up my favourite IDE to get to work. Full of energy and determination, I added a lot of code, and felt quite good about myself. The only thing left was running the unit tests, to verify that I had not broken anything.
The tests completed fast; too fast. Looking closer, the only output was “Process finished with exit code 0”, and in fact no tests had been run. I tried it a few more times, but still nothing. Even after uninstalling IntelliJ, rebooting, and reinstalling a fresh copy of the IDE; still the same (non)result mocking me “Process finished with exit code 0”.

Completely stumped, I threw in my towel and searched the internet. Usually, I’m less than impressed with answers on stackoverflow.com, but in this case there was actually a hint at the solution!

arcane knowledgeApparently, there is something wrong with some cache somewhere. By going to the File menu and selecting “Invalidate Caches / Restart …”, testing should start working again.
And, as if by magic, it did! Right-clicking a package and selecting “Run Tests in …” started correctly, and lights started showing up beside each test-case. And they where all green. And it was good.

I still don’t understand what was wrong, and what I did to fix it, but now I at least have added another tool to my arsenal of arcane knowledge.

The referenced question at Stack Overflow can be found here:
http://stackoverflow.com/questions/13157815/intellij-idea-sudenly-wont-recognize-tests-in-test-folder

Java Constructor Anti-Pattern

I have never liked the typical java way of creating constructors for a typical “bean” class. The preferred way, by many, is to have the constructor arguments directly map to the fields in the class, and assign each in turn to the “this.” prefixed name.

I have always preferred to have the constructor arguments be short one-or-two-letter variables that you assign to the fields. This avoids the following problem I found today:

public class MetadataEntityDescriptor {
    private ContactPerson contactPerson;
    private IDPSSODescriptor idpSsoDescriptor;

    private MetadataEntityDescriptor(IDPSSODescriptor idpssoDescriptor,
                                     ContactPerson contactPerson) {
        this.idpSsoDescriptor = idpSsoDescriptor;
        this.contactPerson = contactPerson;
    }

    public static final class Builder {
        private IDPSSODescriptor idpssoDescriptor;
        private ContactPerson contactPerson;

        public Builder setIdpssoDescriptor(IDPSSODescriptor idpssoDescriptor) {
            this.idpssoDescriptor = idpssoDescriptor;
            return this;
        }

        public Builder setContactPerson(ContactPerson contactPerson) {
            this.contactPerson = contactPerson;
            return this;
        }

        public MetadataEntityDescriptor build() {
            return new MetadataEntityDescriptor(idpssoDescriptor, contactPerson);
        }
    }

    public Element asXml() {
        return new Element("EntityDescriptor", Constants.NAMESPACE_METADATA)
            .addContent(idpSsoDescriptor.asXml())
            .addContent(contactPerson.asXml());
    }
}

Why does the asXml() method here give a NullPointerException? The code looks good and even compiles. But notice the subtle capitalization bug in the first parameter of the constructor… In fact, the argument was never assigned to the field, and it thus stayed “null”. Fortunately my IDE caught it, but I did not see that until I had scratched my head a few times regarding the strange NPE.

Now, I will admit that an argument FOR having complete argument names is that it looks nicer in the IDE when you see the argument popup help. But to me that is not enough; I’d rather have shorter and less error prone code such as this:

public class MetadataEntityDescriptor {
    private ContactPerson contactPerson;
    private IDPSSODescriptor idpSsoDescriptor;

    private MetadataEntityDescriptor(IDPSSODescriptor isd,
                                     ContactPerson cp) {
        idpSsoDescriptor = isd;
        contactPerson = cp;
    }

    ...
}

And finally, this is of course a great argument for moving to Scala, where the equivalent, error proof code would be:

class MetadataEntityDescriptor(var contactPerson: ContactPerson,
                               var idpSsoDescriptor: IDPSSODescriptor) {
  def asXml = <EntityDescriptor>
      { idpSsoDescriptor.asXml }
      { contactPerson.asXml }
  </EntityDescriptor>
}

Collaborative vs Destructive Cooperative Games

My conjecture is that most games of a competitive nature can be played out as either collaborative or destructive games. In the first case, both parties collaborate in a competitive environment to bring out the best in each other in creating a best possible game experience. While in the other case, each party sees as its winning strategy to counter the opposition.

Both ways are valid, in the sense that both lead to a realization of the goal of winning the game. But in my experience, the collaborative approach is preferable in my enjoyment of the games.

In fact, one of my favourite games, the board game Go/weiqi, has a nickname of “hand dialogue”. A successful game has the feel of both players carving out the end position, much like a sculptor discovering the hidden statue in a block of marble. Even loosing such a game is a good feeling, as the process of getting to the end state has been productive and allowed the players to use their best abilities to construct a viable strategy, and a solid framework.

Playing against people using destructive tactics feels completely opposite. Every beautiful shape is destroyed, and the board ends up as a twisted mess of intertwined failures. In the end, the final state can not come soon enough to put me out of my misery.

I feel the same playing StarCraft 2 as well. At least in the Bronze League, where I dwell, the abundance of “cheese” is apparent, in that 6 pools, cannon rushes, and drone rushes are to be expected rather than being the exception. Having lost a number of games to these tactics, I of course become more adept at dealing with them. And overall my win-rate have improved dramatically when being able to counter these low-level destructive tactics.

But is it so that a beautiful strategy is always superior to a destructive one? Destruction is much easier, and as such should require less skill from the player. But a constructive strategy will have no more value than a pretty sunset, if it can not deal with the harsh realities of life.

So I guess in a sense there is a fluid continuum of strategies, and to be successful one has to find the right balance between constructive play and destructive play.

But I’m still stuck in the chivalrous ideal of honesty, truth and beauty, and will judge my oppositions performance based on those values. Even if I loose the game, I will not lose my pride.

Akai LPD8 controller for Ableton Live 8

UPDATE: The following is a quote from the release notes for Ableton Live 8.2.2:

8.2.2 Release Notes. Improvements and feature changes: Added control surface support for Akai Professional LPD8.

So finally the contents of this article is not relevant anymore 🙂

The original article follows


This is how to set up Ableton Live to use the Akai LPD8 controller.

The Akai LPD8 is an ultra-portable pad controller. It has 8 sensitive trigger pads and 8 assignable knobs. It is plug’n’play for Windows and Mac, so in theory you can just connect it and start using it with your favourite music production software.

AKAI LPD8 MIDI pad controller


When you first connect the LPD8, it will show up in Live as a MIDI note input device enabled for triggering note events. So just load up a drum kit on a MIDI track, arm it, and start hitting those triggers.

There is no native support for the LPD8 knobs in Ableton Live, though. So a lot of the more powerful features of remote controllers, such as instant mapping and device locking, are not enabled by default.

To start using the LPD8 in “Manual Control Surface Setup” mode, you must go to the Preferences, MIDI Ports section, and enable the “Remote” button. Twiddling the knobs will now send MIDI data to Live, but nothing really happens just yet. The last step is to go to MIDI Learn mode, select the parameter you want to change, and move the corresponding knob to link the knob to the software control.

Now, the problem with the Manual Control and MIDI Learn mapping is that the link between the knob and the control is not context sensitive. This is the most interesting feature of natively supported controllers, because then you can use the same knobs to control all different instruments and sound parameters depending on what is currently selected.

So to get to this exalted level of controller support, we need to implement native support for the LPD8.

The official Ableton Live manual has nothing about how to do this, and searching around on the internet may lead you down a severely complicated path with multiple python scripts and internal APIs etc. But I found an easier way in an article called Ableton Live MIDI Remote Scripting How To: Custom Korg nanoSERIES Control. This tutorial was for setting up a similar (but inferiour…) controller, so I tweaked the scripts a little for the LPD8.

The key is to find the User Remote Scripts folder in your Preferences for Ableton Live. Here you will find actual instructions and a template for writing your own script. This script must be placed in a subfolder named after your controller.

So I created the folder Library/Preferences/Ableton/Live 8.1.5/User Remote Scripts/AKAI LPD8/. In this folder I put the following file, called UserConfiguration.txt

# Config File for User-defined Instant Mappings

# We assume that the controls on your MIDI controller
# send CCs (except for pads). All controls that do not have
# an explicit channel setting are expected to use the
# global channel. CCs & Notes are counted from 0-127
# and channels from 0-15.

[Globals]
# The channel that the controller should send on
GlobalChannel: 0
# If your controller is connected via USB, replace ControllerName
# with the name of the respective port. Live will then try to 
# recognize the ports for you when you select your Instant-Mappings
InputName: LPD8
OutputName: LPD8
# If your controller has pads that send notes, you can use them to
# play the visible pads in your DrumRacks. Just replace the -1 for
# the note (and channel) of the respective pad. The arrangement of
# the pads in the DrumRacks is as follows:
#   1     2     3     4
#   5     6     7     8
#   9    10    11    12  
#  13    14    15    16
# (If you leave the channel of a pad at -1, Live will assume that
#  the pad uses the global channel)
Pad1Note: -1
Pad2Note: -1
Pad3Note: -1
Pad4Note: -1
Pad5Note: -1
Pad6Note: -1
Pad7Note: -1
Pad8Note: -1
Pad9Note: 40
Pad10Note: 41
Pad11Note: 42
Pad12Note: 43
Pad13Note: 36
Pad14Note: 37
Pad15Note: 38
Pad16Note: 39
Pad1Channel: -1
Pad2Channel: -1
Pad3Channel: -1
Pad4Channel: -1
Pad5Channel: -1
Pad6Channel: -1
Pad7Channel: -1
Pad8Channel: -1
Pad9Channel: -1
Pad10Channel: -1
Pad11Channel: -1
Pad12Channel: -1
Pad13Channel: -1
Pad14Channel: -1
Pad15Channel: -1
Pad16Channel: -1

[DeviceControls]
# The Encoders will control the device parameters (you can also
# use knobs or sliders). Replace the -1's with the CCs sent by 
# the respective controls on your controller. You can also set
# the channel for each controller if it differs from the global
# channel (if you leave the channel of an encoder at -1, Live
# will assume that the encoder uses the global channel).
Encoder1: 1
Encoder2: 2
Encoder3: 3
Encoder4: 4
Encoder5: 5
Encoder6: 6
Encoder7: 7
Encoder8: 8
EncoderChannel1: -1
EncoderChannel2: -1
EncoderChannel3: -1
EncoderChannel4: -1
EncoderChannel5: -1
EncoderChannel6: -1
EncoderChannel7: -1
EncoderChannel8: -1
# Enter the respective map mode for the encoders here. The following
# map modes are available:
# - Absolute
# - Absolute14Bit
# - LinearSignedBit 
# - LinearSignedBit2
# - LinearTwoCompliment
# - LinearBinaryOffset
# - AccelSignedBit 
# - AccelSignedBit2
# - AccelTwoCompliment
# - AccelBinaryOffset
# Consult the controller's documentation to find out which mode to use.
EncoderMapMode: Absolute
# Buttons used here are expected to not be toggles (i.e., sending 
# value 0 every second time you press it).
Bank1Button: 9
Bank2Button: 10
Bank3Button: 11
Bank4Button: 12
Bank5Button: 13
Bank6Button: 14
Bank7Button: 15
Bank8Button: 16
NextBankButton: -1
PrevBankButton: -1
LockButton: -1

[MixerControls]
# Again enter the appropriate CCs for the respective controls.
# If all sliders use the global channel to send their data,
# you can leave the channels at -1. You can, of course, use
# encoders or knobs instead of sliders.
VolumeSlider1: -1
VolumeSlider2: -1
VolumeSlider3: -1
VolumeSlider4: -1
VolumeSlider5: -1
VolumeSlider6: -1
VolumeSlider7: -1
VolumeSlider8: -1
Slider1Channel: -1
Slider2Channel: -1
Slider3Channel: -1
Slider4Channel: -1
Slider5Channel: -1
Slider6Channel: -1
Slider7Channel: -1
Slider8Channel: -1
MasterVolumeSlider: -1
MasterSliderChannel: -1
Send1Knob1: -1
Send1Knob2: -1
Send1Knob3: -1
Send1Knob4: -1
Send1Knob5: -1
Send1Knob6: -1
Send1Knob7: -1
Send1Knob8: -1
Send2Knob1: -1
Send2Knob2: -1
Send2Knob3: -1
Send2Knob4: -1
Send2Knob5: -1
Send2Knob6: -1
Send2Knob7: -1
Send2Knob8: -1
TrackArmButton1: -1
TrackArmButton2: -1
TrackArmButton3: -1
TrackArmButton4: -1
TrackArmButton5: -1
TrackArmButton6: -1
TrackArmButton7: -1
TrackArmButton8: -1
VolumeMapMode: Absolute
SendsMapMode: Absolute

[TransportControls]
# The transport buttons are also expected not to be toggles.
StopButton: -1
PlayButton: -1
RecButton: -1
LoopButton: -1
RwdButton: -1
FfwdButton: -1

With this file in place, the next time you start Ableton Live, you will find AKAI LPD8 as a possible selection in the Preferences MIDI Control Surface drop-down box. Select this, and go back to your musical masterpiece.
If you now try to click on an instrument rack control, you will get the blue hand icon, and your LPD8 will control the parameters. A typical instrument rack has 8 virtual knob controls, neatly mapping into the 8 physical knobs on the LPD8.

For more complex controls, such as the Operator synth, the knobs will control individual detailed parameters. When there are more than 8 parameters, they will be assigned different “banks”. To switch banks using the LPD8, push the “CC” button, and use the trigger pads to select bank 1 (pad 1) through bank 8 (pad 8). The status bar at the bottom of Live’s interface will show you the name of the bank, such as “Operator Bank : Oscillator B” for pad 2, or “Operator Bank : LFO” for pad 5, etc.

Now, you can finally enjoy detailed control of all Live parameters using the Akai LPD8 controller.

PS: Akai also makes the fabulous Akai LPK25 ultra-portable MIDI keyboard, in the same style as the LPD8. They go very well together, and I recommend getting both to have a complete on-the-road MIDI setup for your laptop.

Rumours of Death

Death
The rumours of this blogs death were slightly exaggerated, although justified. Consistently posting required a level of commitment, and time, was not compatible with my increased workload in studies and in the office, combined with my dwindling enthusiasm for acting like a tourist. So I have rather spent my time actually doing stuff, than writing about it…

I have just a few weeks left in Taipei now. It is a strange feeling, as most of my classmates are continuing on. They have started thinking about the next semester, while I already feel like I have finished. School does not end until 27th May, but the “big exam”, covering the first 8 chapters in the book, is on Monday 18th May. But common for all students, is a feeling of being tired, and also slightly fed up with Chinese (both the language and the people). A break/vacation will do us all good :). I have bought the rest of the textbooks, and will take them back with me to Norway to continue my studies at my own pace. But maybe not until after summer…

The coming two weeks will see me wrapping up a lot of stuff in different areas of my life here. I will finish studies, wrap up the close cooperation with the Taipei Yahoo! office, buy a lot of souvenirs/books/things, have my TKD yellow belt test, and spend some quality time with friends I’ve gotten to know here. The last days I will clean out my apartment, and mail as much as possible of my stuff back to Norway, to avoid having to overload my suitcase…

I have some random pictures from around Taipei I will share as well, but until Monday I will try to focus on preparing for the exam. So, see you later…


Picture by mugley at Flickr. CC-BY-SA-2.0

Taking a break

This weekend has been both exiting and relaxing. After a focused week of studies, and a successful test, I allowed myself to enjoy some good experiences in good company. Studies can wait until next week :).

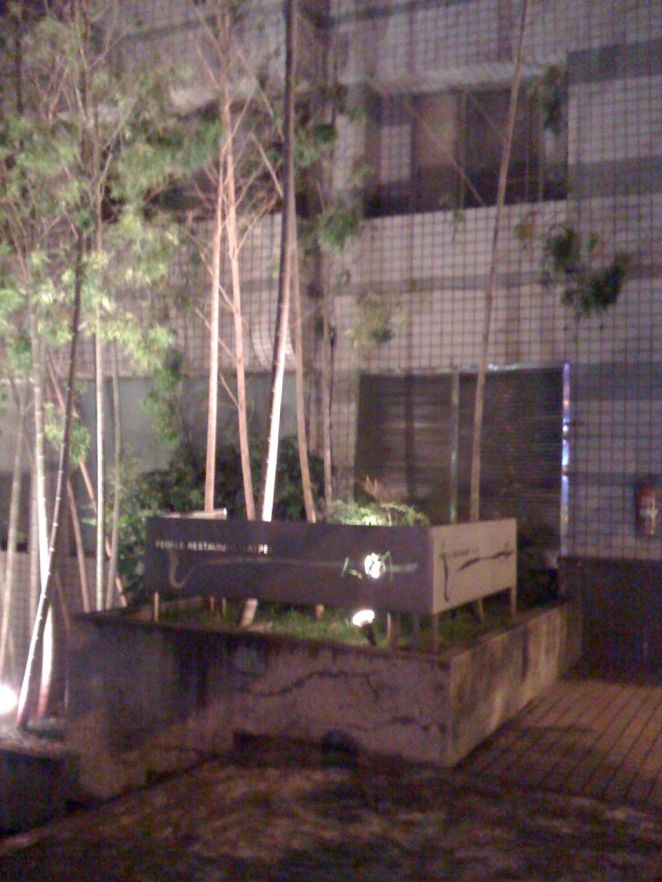
People's RestaurantFriday I visited a rather stylish restaurant called “People’s”. It is located on the hip 安和路/ĀnHé road, down the street from Carnegie’s and right across from the Shangri-La hotel. The entrance area was calm and zen-like, with minimalist decor. The stairs leading down to the restaurant ended up in front of a huge, metal double door. To open the door, you have to put your hand into the mouth of a nearby lion statue…

Zen stairsThe styling and serenity of the place continued once past the doors. Spacious rooms with concrete walls, with dimly lit tables and small pools of water. The restaurant is divided into a dining area, and a lounge area, so all tastes and uses are catered for. The presentation and quality of the food was excellent, and the small portions enabled us to order several small courses, building an eclectic meal. Due to the dim lighting and the calmness of the place, though, I felt it inappropriate to take pictures once inside…

After dinner, we went to a small restaurant/pub called Mango Tango. My friend knew the owner and many of the regulars, so it was a fun and friendly place to be. I’m not much of a cocktail person, but this night was perfect for trying out some of the local specialities, and also a few classics. We started out with the local favourite Mango Mojito, and I also got to try a rather delicious Long Island Ice Tea, before moving onto the Peron Tequila…

HairdressersNaturally, Saturday started a bit late for me, but I managed to get to TKD training on time. After that I decided to have a quick haircut. I have been dreading the day I was going to get a haircut, having seen too many of the small corner-shop type shops with old men getting their hair done by another old man. Suffice to say, they are not really accustomed to western tradition and western language, so this could prove difficult. Fortunately, in the area of the MMA gym, there are also a lot of beauty shops and hairdressers. Exploring these for a bit, I found a place that looked like it had a more western flavour to it, so I decided to stop by. I was not prepared for how well taken care of I would be.Getting a haircut One and a half hour later, I emerged with my new haircut. It started with me relaxing in the chair with some magazines and a continuous stream of iced milk-tea. Then, a long session of shampooing+head massage in a dimly lit room with soothing music and beautiful and skillful girls doing their best. The hairdresser did a good job, and our combined knowledge of English and Chinese made for a mutual understanding sufficient to produce a great result. What surprised me a bit, in a good way, was that after the initial haircut, it was back in to the head massage room, for more washing and relaxing. Then it ended with styling and finishing touches. And for all this I payed less than what you pay for a child having a 10 minute haircut in Norway… I will definitively not wait long before my next haircut :).

SingerLED tambourineThe BandSaturday evening was approaching, and with that a visit to a pub in Taoyuan City. Marco from work, and his wife, picked me up for the 40 minutes drive from downtown Taipei. The band that was playing are friends of Marco, and he previously played with them as well. The place was small, but that seems common in Taiwan. We got to sit up close to the band, and before and between the sets they came over to chat. It was a friendly and fun atmosphere. The band played pop music with a jazzy flavour. And they also engaged the public in different ways, either by inviting them to the stage to sing or participate in some way, or by selecting material by request, or to suit the mood of the crowd. I had heard that people in Taiwan really like cha-cha, but this night there were mostly students. So only two cha-chas were performed, and I got to dance to one of them :).

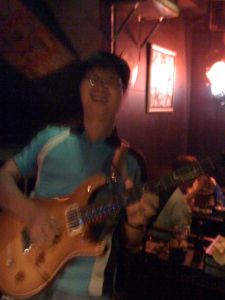
Marco playingTowards the end of the last set, Marco got to try out the guitar, and while the guitar player relaxed with a beer, Marco performed a few songs with the band, including a passionate rendition of Hotel California. We left shortly after the band ended, since morning was fast approaching. Everybody was in a good mood, except perhaps the Budwiser Girl whom, wearing a skimpy outfit, tried to convince people to drink Bud. I tried one, but had to dissapoint her with going back to Heinikens…

Fava beanOn a culinary note, the beer in the pub was superbly accompagnied by a snack called 蠶豆/cándòu/fava bean. It was a kind of fried flat nut, that had a very thin shell. It was dryish and not fatty; it tasted closer to a nut like pistasio, than peanut. And it absolutly killed the artificually flavoured butter popcorn that was on offer.

Sunday will be short this weekend. A few hours of studies and dinner, maybe a few episodes of Lost. And then, trying to break my daily rythm back into coinciding with class and work :). Until next time, 再見!

Wine Prices

Mouton Cadet 2006Just bought a few bottles of wine. Given that the wine here is available in the local corner store, one might imagine that the price structure is different than provided by the government monopoly in Norway.

One of the wines I bought, was a Mouton Cadet 2006. In Taipei, this cost NT$760, which is almost exactly NOK 150. In Norway, this costs NOK 125. So it is actually cheaper. I looked at a few other bottles that I recognized from Norway:

Name Taiwan price Norwegian Price
Mouton Cadet 2006 NT$760=NOK 150 NOK 125.00
Torres Coronas NT$550=NOK 104.2 NOK 105.90
Gato Negro NT$420=NOK 79.50 NOK 86
Yellow Tail Syrah NT$399=NOK 75.6 NOK 99.90
Le Cardinal NT$379=NOK 71.80 NOK 99.90
Casillero de Diablo (discount) NT$265=NOK 50.20 NOK 99.90

So I guess this hints towards a conclusion that, as is general knowledge, the Norwegian wines have a more shallow price curve than most markets; with cheaper wines being more expensive, and the better wines actually being more reasonably priced than in other markets.

Another factor to consider, of course, is the availability of different kinds of wines. The Mouton Cadet was the most expensive wine on offer, and the shelves are dominated by cheap and “own brand” bottles that obviously cater to the drinker, not the collector. With discounted items, you can get a wine for half the price in Norway, but would you really even consider buying that wine in Norway?

There is also spirits and beers on offer, but again focused on mass market consumption rather than the connoisseur’s palate.

Ob-Chinese: Many words related to alcohol and drinking feature the character 酒/jiǔ, meaning (rice) wine, liquor, spirits, alcoholic beverage.

  • “Wine” is 酒漿/jiǔ jiāng
  • “beer” is 啤酒/píjiǔ
  • “bar” 酒吧/jiǔ bā (by sound loan)
  • “food to accompany wine” 酒菜/jiǔ cài (lit. alcohol-food)
  • “a friend when wining and dining, i.e. when times are good” 酒肉朋友/jiǔròu péngyou (lit. alcohol-meat-friend)
  • “tipsy feeling” 酒意/jiǔ yì (lit. alcohol-thought)
  • “capacity for alcohol/ability to hold drink” 酒力/jiǔ lì (lit. alcohol-strength)

As my Chinese Writing teacher would say (constantly):

“It’s easy! But, be careful…”

First essay

We just had our first essay homework. I’m fairly pleased with the result, even though the language content is infantile and the writing is on a low amateur level. I even had a wrong stroke, changing the meaning of a character.

We are progressing reasonably quickly, so my next essay will hopefully contain more words, and more mature grammatical structures. Next week I’m also starting calligraphy class, so the writing craftmanship will no doubt improve as well 🙂

First essay

Taipei week 3+ – Getting to work

March 1st. The time finally arrived for me to move into my newly rented apartment. Having lived in a hotel for almost two weeks, I had gotten used to the easy life, and the friendly faces greeting me in the reception. Also to the fact that my basic needs where provided for.

I arrived at the apartment at 5pm, getting my keys from the landlady. The first thing I noticed was that the cleaning left something to be desired; but that’s ok for me: one less thing to worry about when “checking out” in three months… Then the fact that the furnitured apartment was totally lacking in glasses, plates, chopsticks etc (as well as food and drink, of course). So a trip to the local “super” market becomes the next point on the agenda.

The last surprise of the evening is when I attempt to go to sleep. The bed (covered in a hideous sheet with actual pink flamingos), is like lying on a wooden board, but with steel springs popping up at random locations. This crosses the border from inconvenient to unusable, and the first night established the fact that my back would not last three months sleeping on this bed.

IKEA TaipeiFortunately, one of my colleagues at work tipped me about IKEA having a store in Taipei. They used to go there all the time when they needed something for the home. I can imagine IKEA being seen as somewhat exotic here, although to me it was just like going back home to Norway. To make a long story short, after several trips to IKEA, I managed to put the apartment in proper working order, with both an extra matress for the bed and some less hippiey sheets, as well as some subtle decorations to humanize the place. And, no, I did not eat the kjöttbullar for dinner, but I did buy some knäckebröd for breakfast…

Apartment bedApartment TVApartment kitchen topApartment bathroom

This week also marked a radical shift in the weather. While February had been unusually hot (Hong Kong measuring the highest mean temperature in recorded history with 20.3℃), March saw temperature drop to the low teens, and rain and wind completing the unpleasantness. This, combined with my apartment fixing project and school starting, put a damper on my tourist activities. I will get back with more of this later :).

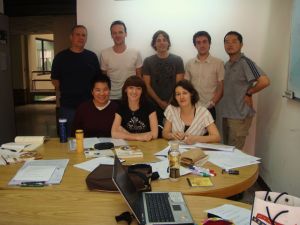
(most of) Class at MTCThe apartment is just a 7 minutes walk from the office, and a further 15 minutes to the school. School started the 5th of March, with an orientation meeting the day before. Each class was 8-10 students. The first few days there were some leaving and joining classes, but our class settled down at nine people, hailing from Japan, France, Ireland, USA, Brazil, Belarus and Norway. Writing this post, I have just completed the first two full weeks of class.

We started by learning pronunciation. I (covertly) managed to convince the class that we should be focusing on learning Bopomofo (ㄅㄆㄇㄈ) for this, as I find the romanization of Pinyin to just be confusing and inconsistent. Bopomofo has a strong position in Taiwan, but not much outside. It is mainly a teaching aid, while pinyin in fact is being used to publish normal texts in mainland China. Using bopomofo, we where able to learn the subtle differences between some of the sounds in the language, as well as gaining a rudimentary starting vocabulary without having to learn the actual Chinese characters for those words. Parallell to this first week, there was, conveniently, a pronunciation class in the big auditorium as well. Here the focus was more on repeating, in unison, what the teacher said. It worked well as additional practice, though, and also provided more hours each day to get into the proper “mind set”.

The next week started by attacking lesson 1 in the textbook. Introducing yourself, asking the other persons name and nationality, etc. Here we started using proper characters, and started learning to write. And again, parallell to this, there was an introduction to writing class in the big auditorium.

Class is going great, the people in my class are fun and eager to learn, and the teacher is enthusiastic and attentive to each individual’s needs. I have firmly established myself as a “good student” by doing my homework, acing all the tests so far, and being focused and helpful in class. My biggest challenge is proper pronunciation, as I don’t have continuous opportunity to speak chinese. I find, though, that sounds and tones are not very difficult for Norwegians, compared to some of the other nationalities gathered in my class.

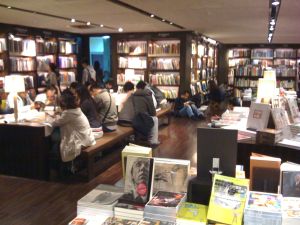
Eslite reading areaI did spend a few afternoons walking around the city. One of my trips were to a big 24h bookstore called Eslite. The flagship store on 敦化南路/Dunhua South Road is big, and has gradually developed into a kind of mall; the focus is still on books, though. And being open around the clock provides a unique service to it’s patrons. All around the store, people were sitting down or standing up, reading books and taking a good time about it. Reading a book seemed not frowned upon, as is normal in my country, but rather encouraged, with even a special reading table set up for extended browsing. The amount of books on offer was impressive, although for me the Chinese language books are still somewhat outside my competence level. When I was there, the shop was full of people, but there was no real lines forming at the counter. I don’t really know how they stay in business, providing what looked to me more like a library than a bookstore focused on peddling books. But I guess filling the store with people is a good way to turn a profit on the percentage that actually buys some of the goods on offer.

After this post, I will turn my attention to specific events and topics, rather than trying to do a general diary of weeks. I imagine my time will be much focused on going to class, and studying the subject, and less time will be spent exploring the surroundings. For Spring Break though (April 2-3), I have signed up for a trip to Green Island, of the south east coast of Taiwan; I’m looking forward to that.

Rice in duck's bloodUntil next time, I leave you with a snapshot from the local food store, of a produce I have not yet tried (again thanks to the clear labeling), “Rice in Duck’s Blood”.